14.04.2018
3118
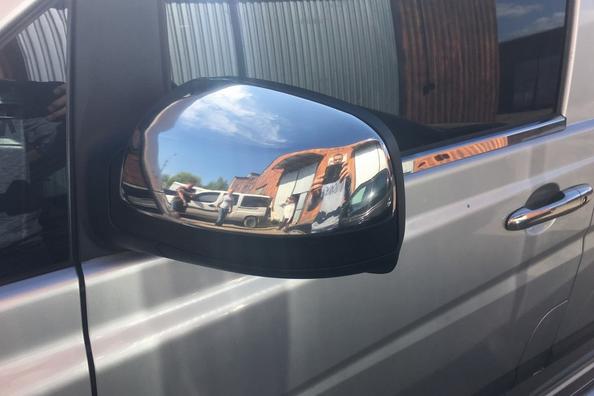
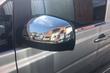
For some, this material will seem useless and superfluous, because to install chrome trims on the car easy. But I can assure You that in practice sometimes things don't turn out so clear. Always do You succeed the first time gently stick the tape, it always was the perfect surface? It is the same. It's one thing. If you need to caulk the hole in the shed, and another thing when it comes to the important areas. And even more important flawlessly to install chrome overlays on Your beloved machine.
Yes, it is an instruction "for dummies", but there is nothing to shame because we are all in some area of knowledge and skills belong to this non-prestigious category. But what to do, to know everything is impossible, so we proceed to the presentation of main methods and features of mounting pads on the surface of the vehicle and its component parts.
Stage 1: preparation. Can long to gather you to install patches, but at the same time to forget all that we need to implement the process. And then all the work to turn into an endless quest and walking from apartment to garage and back. To perform operations we need: tape or sealant, Hairdryer, rags, degreasing agent (it can be thinner, automotive wipes or alcohol - unless, of course, not sorry), a marker, a plastic spatula (if necessary dismantling at the wrong labeling of parts), drill (if we are talking about plates with locking latches).
Step 2: clean surface. Everything is standard and logical. We remove the dirt, wash using a solvent, alcohol, or other means remove grease, lubricants, rust. Well, the final chord of this phase we wipe the installation place dry and clean cloth or rag.
Step 3: markup. Apply the pad to the intended place of installation of the lining, adjust its position after a token limited area of fastening or drilling.
Step 4: install.
a) when using a gasket (silicone) is necessary to apply it in a thin layer on the surface of the body, it is also possible for the best coupling is the same amount of sealant to put on the mounting area marked on the surface of the car. We must remember that an excessive amount of adhesive substance will lead to looseness of connections and subsequently to the formation of cracks and the gradual weakening of the contact. Then the detail for a few minutes tightly to the surface, making sure that it evenly adheres to the base plane around the perimeter.
b) when using two-way tape. If it is already installed on the pad, you need to carefully remove protective layer and press it to the designated marker area. If masking tape is a separate component of the installation, it is necessary, removing the protective film, gently stick to the base surface. Then open the outer sticky part of the tape and attach the surface of the part. Tape is better to preheat with a hair dryer for 1 - 2 minutes. After the deduction of the pressure you can also use this device, and then another to put under stress the resulting compound.
C) in the case of applications with locking elements (clips, locks, antennae, clips) to the mounting surface drilled holes. After processing and installation of rubber seals in the hole pads are installed and fixed on the inner side provided by the mechanism.
Stage 5: check of correct attachment. After installation, the pad must sit in what is called "dead". Tests for the proper accommodation, lack of clearances and displacements, smooth contact area without protruding tape or silicone residues. In the case of their presence, they must be removed immediately. Well, to the work done went down the drain, it is recommended not to expose the pimping machine "water treatment" during the first few days after installation.
Step 6: collect the remnants of the degreasing substance (not thinner of course) or find something noble, call friends and note the result. This item we strongly recommend to neglect!
That's so fun you can spend time for installing accessories. And if you follow our recommendations and do not commit gross errors (e.g. 6-th stage to move to the top of the list), then You will succeed the first time and without rework.
Shipping to EU
Wholesale and retail
Own warehouse
Опис продукту
Подарунки не надаються при оформленні покупки у кредит під 0,01% або при покупці частинами.