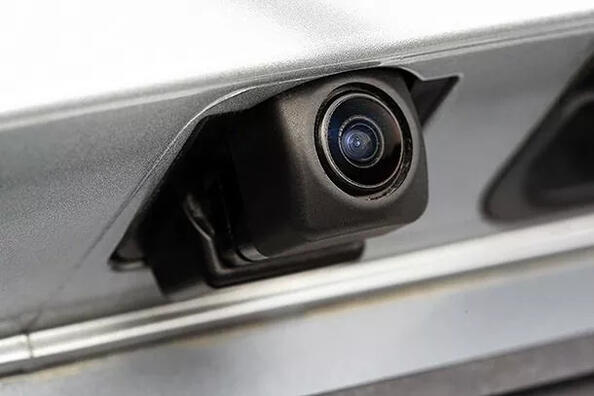
A rear view camera is an indispensable assistant for every driver, which significantly increases safety and comfort when parking and reversing. Installing a rear view camera in a car is a relatively simple procedure that you can do yourself, saving on car service services. You can also improve your car and add practicality to it by using tuning accessories, a large selection of which is available in our online store.
What you will need
Required tools and gadgets:
- Rear view camera (compatible with your car).
- Monitor or head unit with video input.
- Tool kit (screwdrivers, pliers, electrical tape, cable ties).
- Wires for connecting power and video signal.
- Drill or screwdriver (depending on the type of camera mount).
Step-by-step instructions
- Preparation:
- Choose a location to mount the camera (usually above the license plate or in the bumper).
- Disconnect the car battery for safety.
- Wiring:
- Run the wires from the camera installation location to the monitor or head unit installation location, hiding them under the interior trim.
- Camera installation:
- Secure the camera in the chosen location using screws or double-sided tape, depending on the type of mount.
- Connecting power and video signal:
- Connect the camera power to the reversing lights (so that the camera turns on when reverse gear is engaged).
- Connect the video signal to the video input of the monitor or head unit.
- Testing and tuning:
- Connect the battery and turn on the ignition.
- Engage reverse gear and make sure the image from the camera is displayed on the monitor.
- Adjust the camera's viewing angle if necessary.
Installing a rear view camera is a useful improvement to your car that will make driving safer and more confident. If you are not confident in your abilities, we recommend contacting specialists for professional installation.