

































































 Author: Radomskyi Maksym Vasyliovych
If your bike rack is wobbling while you’re still in the parking lot, the issue is almost never just one screw. Most often it’s a combination of play in the receiver, the shank not being fully seated, an under-tightened anti-wobble assembly, or inherent movement in a hinge. And the key isn’t to “tighten harder”, but to understand exactly where the movement appears: in the hitch, in the adapter, in the platform, or in the folding joint itself.
Before you set off, the check takes just a few minutes. But it’s exactly what helps you tell normal small manufacturing play from a situation where the rack isn’t fully seated, is pressing against the bumper or spare tire, or doesn’t match the mounting type for your specific vehicle at all.
Why this problem happens
Any bike carrier works like a lever: the farther the bikes’ mass is from the fixing point, the stronger the rocking over potholes, joints, and waves in the asphalt. So even a small clearance at the mounting point quickly turns into noticeable wobble.
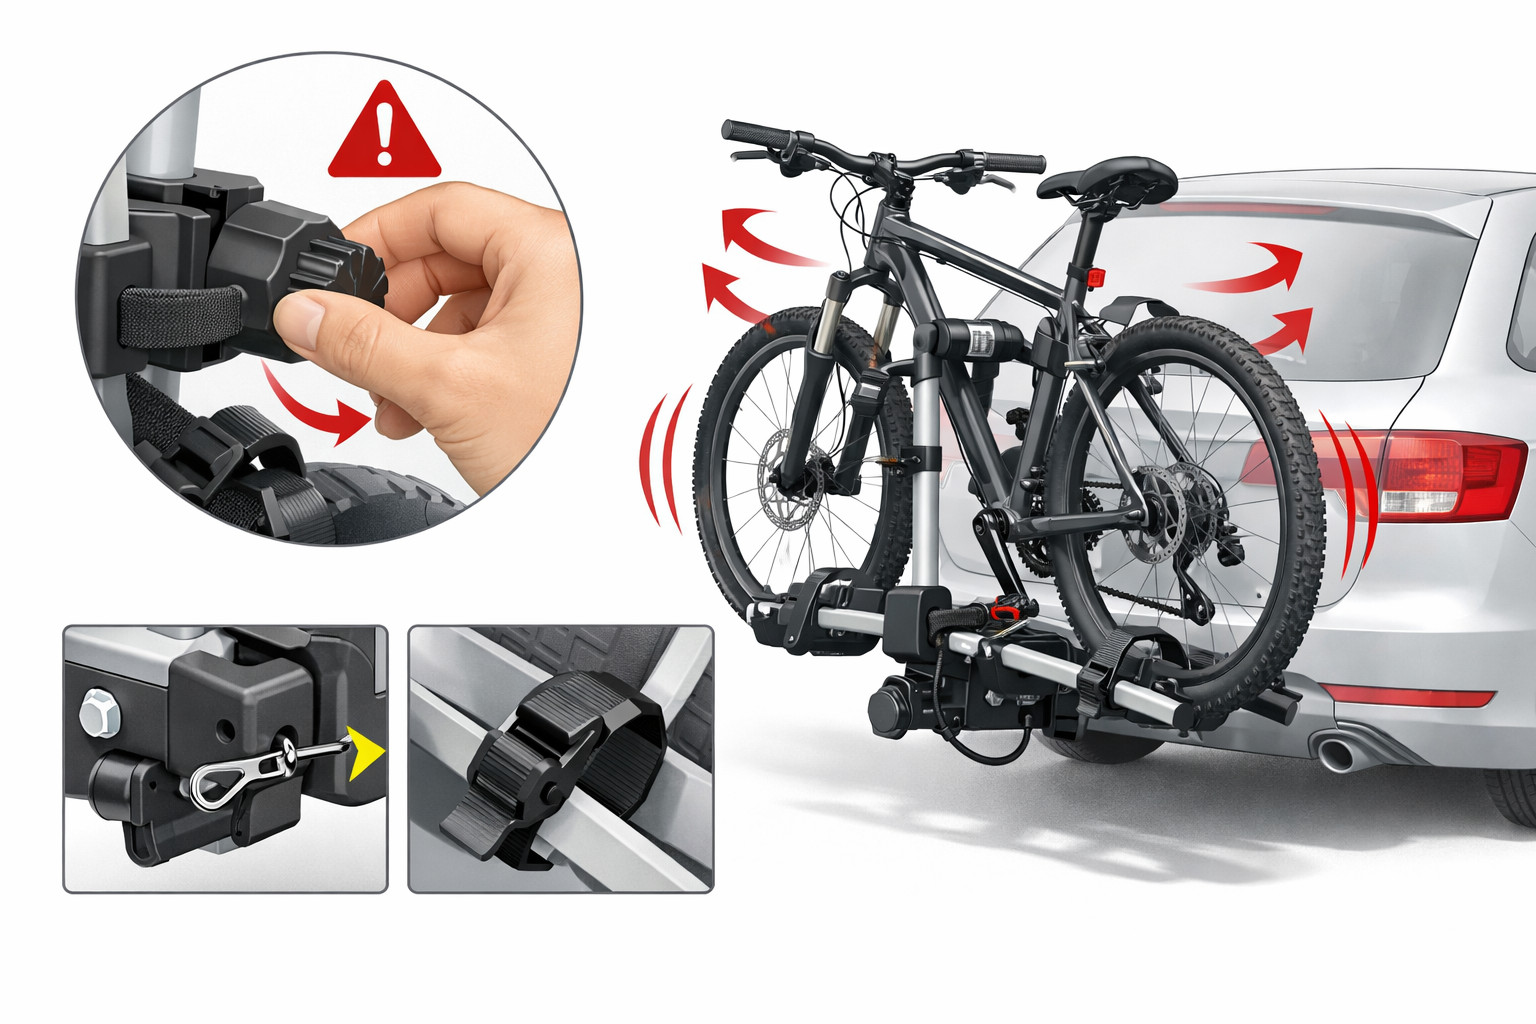
On hitch-mounted systems, the cause is often that the square shank is slightly smaller than the receiver’s inner size, and the final clamping should be done by the bolt or an anti-wobble mechanism. If the shank isn’t inserted fully, the bolt is oriented the wrong way, the assembly isn’t tightened, or an extension is used, the play increases.
With trunk-lid racks the logic is different: movement appears due to straps, soft contact points, poor hook positioning, interference with a spoiler, glass, or seals. The “universal” nature of such systems is conditional: what holds on one body style can be unacceptable on another.
Main causes
- Shank not fully seated in the receiver. For some systems it’s critical that the carrier goes in deep enough; if there isn’t enough insertion from the center of the pin hole to the end of the receiver, the assembly will have play.
- Locking bolt under-tightened or installed incorrectly. Sometimes the threads seat properly only if you slightly support or lift the shank while tightening.
- Wrong hitch size or class. 1¼″ and 2″ systems shouldn’t be mixed without consequences, and adapters add movement and extra load to the joint.
- Extension, swing-away adapter, or hinge. That’s another lever point. Some movement can be inherent by design, but excessive rocking is no longer normal.
- Contact with the bumper, spare tire, or another obstacle. The rack seems inserted, but in reality it isn’t fully seated and gets tightened while misaligned.
- For trunk-lid racks — incorrect vehicle body geometry. Glass near the hooks, load on the spoiler, weak contact surfaces, or loosened straps quickly lead to wobble.
How to understand the cause in your specific case
- First remove the bikes and rock the rack itself. If there’s movement without load, you should look at the fixing joint, not the wheel straps or frame arms.
- See where the movement starts. If the shank moves inside the receiver, the issue is seating, the bolt, the pin, or clearance. If the receiver is rigid but the platform moves, check the hinge or folding joint.
- Check full insertion. The holes should line up without forcing, and the shank shouldn’t hang up because of the bumper, spare tire, or a trim piece.
- Inspect the bolt orientation and condition. If the threads are clamped at an angle, there are signs of misalignment, or the bolt has already been tightened “all the way” without results, the issue isn’t torque—it’s the assembly itself.
- If there’s an extension or a swing-away adapter, remove it temporarily. If the play drops sharply, it’s the main lever being added.
- For trunk-lid racks check the straps after a short drive, the hook positions, the support pads, and whether the system is pressing against glass or the spoiler.
DD Tuning expert comment: the most common mistake is trying to eliminate play by force without checking whether the rack is fully seated and whether the clamping bolt is positioned correctly. The second typical story is when people add an extension to gain clearance to the bumper, and then end up fighting not the cause, but a new lever. If the joint wobbles without bikes, start with geometry and compatibility—not with DIY shims.
Symptoms, causes, and what to do (table)
| Symptom | Likely cause | What to do |
|---|---|---|
| The shank noticeably moves left-right in the hitch | Receiver clearance, incomplete insertion, weak anti-wobble | Reinsert the carrier fully, check hole alignment, tighten the factory clamping mechanism |
| The rack wobbles up-down, especially over potholes | Under-tightened bolt or an extension creates extra leverage | Check the bolt, pin, bushings; if possible remove the extension and mount directly |
| Play appeared after the first short drive | The assembly “settled”, straps or clamps loosened | Retighten all knobs, bolts, straps, and locks after a short distance |
| The platform moves, but the shank sits tight in the receiver | Manufacturing play in the hinge or folding mechanism | Check whether this is acceptable for your model; if the play doesn’t grow and the lock is firm, it may be normal |
| The rack won’t sit straight, as if it’s hitting something | Bumper, spare tire, or another obstacle prevents full insertion | Recheck clearance, don’t mount while misaligned; if needed change the rack type |
| A trunk-lid rack shifts on the body | Loose straps, poor hook point, interference with glass or spoiler | Reinstall per the diagram, check contact surfaces; if the body isn’t suitable, don’t use this system |
What actually helps
Basic mechanics work. First insert the rack fully, then align the assembly, and only then tighten the locking bolt or anti-wobble mechanism in the correct orientation. If the design requires it, support the shank slightly while tightening so the threads seat without binding.
A check without bikes and then with bikes works well. If the joint already moves without load, the issue is installation or compatibility. If everything is tight without bikes and play appears only under weight, look at overload, lever length, extensions, and the rack type.
A repeat check after a short distance post-installation is mandatory. On a long trip it makes sense to inspect the joint regularly, and on rough roads, in heat, cold, or strong wind—more often. Check locks, buttons, knobs, and straps separately: they must not be left unlocked or half-open.
For trunk-lid racks, only precise vehicle-specific installation really helps: correct hook points, clean contact areas, retightening straps after a short drive, and refusing to use it if the system rests on glass, the spoiler, or a soft edge.
What almost doesn’t work or helps only briefly
DIY shims, wrapping with tape, random washers, and wedging usually only mask the clearance. For the first few trips it may seem like a solution, but under load the material compresses and the play returns.
A bad idea is trying to “treat” an incompatible system with yet another adapter. If the rack won’t seat because of the bumper or spare tire, an extension gives clearance but also increases leverage. As a result the problem doesn’t go away—it moves to another joint.
For trunk-lid systems, over-tightening straps “until they crack” almost never works. It won’t fix poor body geometry, but it can load the spoiler, glass, or the edge of the lid. If the body is incompatible, tightening won’t make it compatible.
When accessories or replacing parts makes sense
Accessories make sense only after basic diagnostics. If the factory joint is fine but there’s still manufacturing clearance in the receiver, a proper anti-wobble device or a new factory bolt instead of a worn one can help. But if there’s a mismatch in class, size, or vehicle geometry, it’s more correct to change the system type, not the bolt.
When a hitch-mounted option constantly hits the bumper, requires an extension, or operates near the load limit, it’s logical to look at a different bike rack. If the issue is specifically at the hitch joint and your vehicle already has crossbars, a sensible alternative may be a crossbar-mounted bike carrier. And if you haven’t decided on the system type yet, it’s useful to start with how to choose a bike rack so you don’t end up buying adapters instead of a compatible solution.
Solutions: when they work and when it’s not worth spending money (table)
| Solution | When it works | When it’s not worth spending money |
|---|---|---|
| Reinstallation and proper tightening of the factory joint | The rack simply wasn’t fully seated or was clamped while misaligned | If there’s obvious incompatibility in size, class, or bumper clearance |
| New locking bolt or factory anti-wobble assembly | The old hardware is worn, threads are damaged, or it can’t provide enough clamping force | If the play comes not from the receiver, but from the hinge, adapter, or body contact point |
| Extension or rise adapter | Only when there is physically no clearance without it and the manufacturer allows this solution | If it’s installed “to make it quieter” or to fix the wrong rack type |
| Swing-away adapter | When you need trunk access and there’s enough reserve in class and load rating | If the main complaint is already rocking; the adapter adds another lever |
| Switching to a roof rack | When the hitch joint is problematic and the vehicle has solid crossbars | If there’s no roof base or the bikes are too heavy to lift comfortably |
| Complete replacement of the rack type | When the current system isn’t compatible with the vehicle or constantly requires compromises | If the issue is solved by one correct installation without extra costs |
From a customer’s experience: a typical situation— a hitch rack seemed “defective” because after installation the platform moved a lot in the parking lot. After reinstalling with full insertion, correctly tightening the clamping bolt, and removing an unnecessary extension, most of the play disappeared without replacing the whole kit. In another case, a vehicle owner with a spoiler ditched the trunk-lid system and switched to a different rack type because the problem wasn’t the straps, but the body geometry.
Conclusion
Bike rack wobble before departure is a signal not to panic, but to do a quick check through the chain: insertion, bolt, clearance, adapters, hinges, body contact points. In most cases the problem is solved by correct installation and a recheck after a short drive. But if the system doesn’t fit by size, class, or vehicle geometry, spending on random shims and adapters only delays the right solution. This material is based on real selection experience, installation practice, and real-world use scenarios in which the cause of play is almost always found faster than it seems.
How it works
- Remove the bicycles and check for play First, shake the mount itself without any load. If there is movement already in this state, the problem is not with the bikes, but with the locking unit, the fit, or the compatibility of the system.
- Find the source of the movement Look at exactly where the wobble starts: in the receiver, the platform, the joint, or the folding mechanism. This will help you understand what to check next — the bolt, anti-play, adapter, or the unit itself.
- Check the full seating of the mount The mount must seat all the way in, and the holes must align without distortion. If the bar rests against the bumper, spare wheel, or another obstacle, play will remain even after tightening.
- Inspect the locking bolt and anti-play unit Make sure the bolt is installed correctly, the thread does not go in at an angle, and the unit is tightened in the working position. If needed during tightening, support the bar slightly so it seats without distortion.
- Remove unnecessary adapters for testing If there is an extension, swivel adapter, or another transition piece, remove it temporarily. If the play decreases, that part is adding extra leverage and wobble.
- After a short drive, repeat the inspection After a few kilometers, tighten the straps, handles, bolts, and locks again, especially in trunk-mounted systems. If the mount continues to wobble without a bicycle or does not sit evenly, it is better to change the type of system rather than mask the problem with spacers or overtightening.