30.03.2026
969
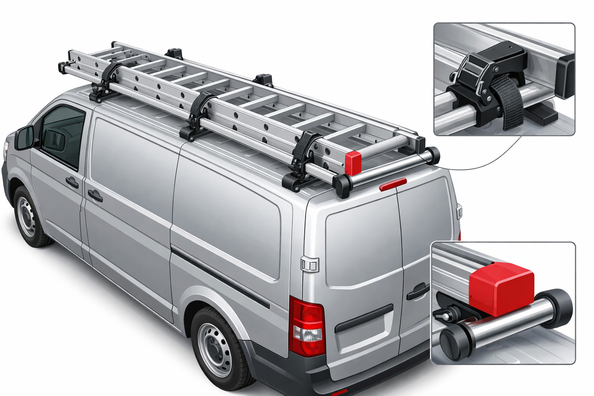
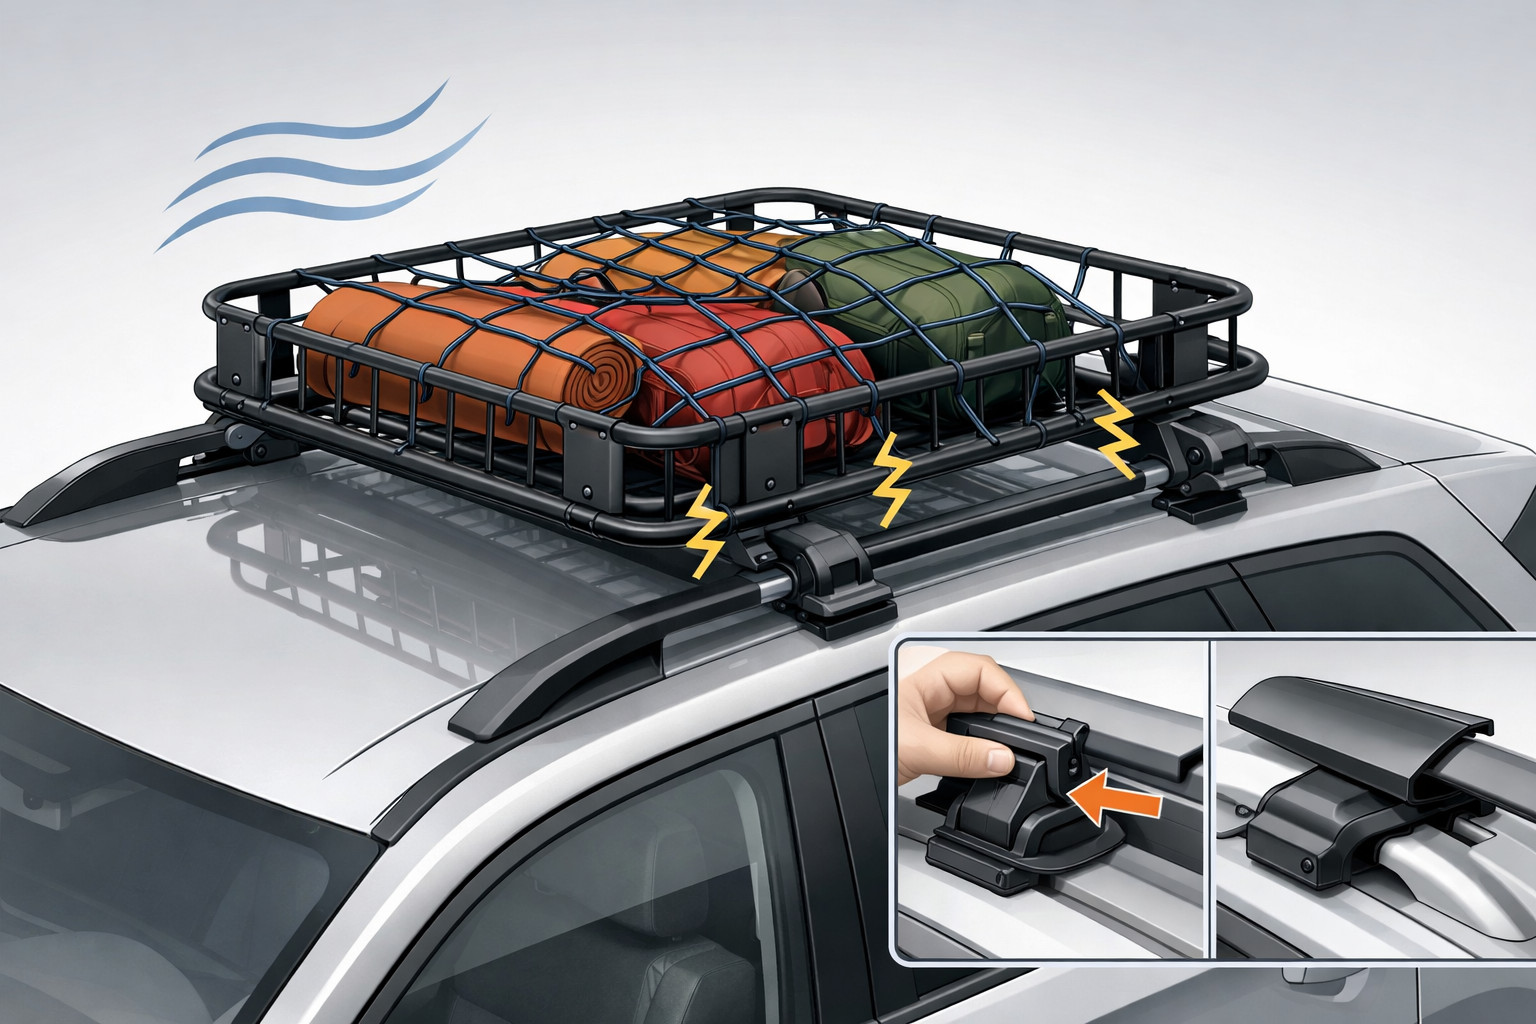
A ladder on a van roof is most often lost not because of one weak strap, but because of a combination of mistakes: an incompatible roof rack, too short a base between support points, gradual loosening of fasteners from vibration, and the lack of a rigid stop to prevent forward or backward sliding. On the highway it shows up fast: the load starts to hum, shift, and under braking or crosswinds the forces spike sharply.
Only a systematic approach works: the ladder must rest on the crossbars, not on the roof; the weight must stay within both the vehicle limit and the rack’s own limit; and the fasteners must be checked not only after installation, but also after the first trip, after rough roads, and after winter use. For some systems, specific numbers matter too: sufficient spacing between crossbars, torque control, and speed limits.
A ladder is a long load with a large windage area. On a tall van roof, it’s exposed not only to static downward weight, but also to longitudinal, lateral, and uplift forces. Hard braking pushes it forward, potholes bounce the mounting up and down, and oncoming airflow and crosswinds try to shift it sideways or lift an edge.
The issue gets worse when the ladder rests not on proper crossbars but partly on the roof, when the support points are too close together, or when the fasteners are tightened “by feel.” Even if a specific van roof allows a high load, that doesn’t mean the roof rack itself can handle the same. You should always size the system by the weakest link.
Start with a basic check without myths. Look up the rated limits for the roof and the roof rack, and weigh not only the ladder but also the frame, brackets, and straps. Make sure the ladder is resting on the crossbars and not rubbing the roof. If the base between the front and rear support is short, the risk of swaying increases dramatically; in some systems the minimum distance starts at 700 mm.
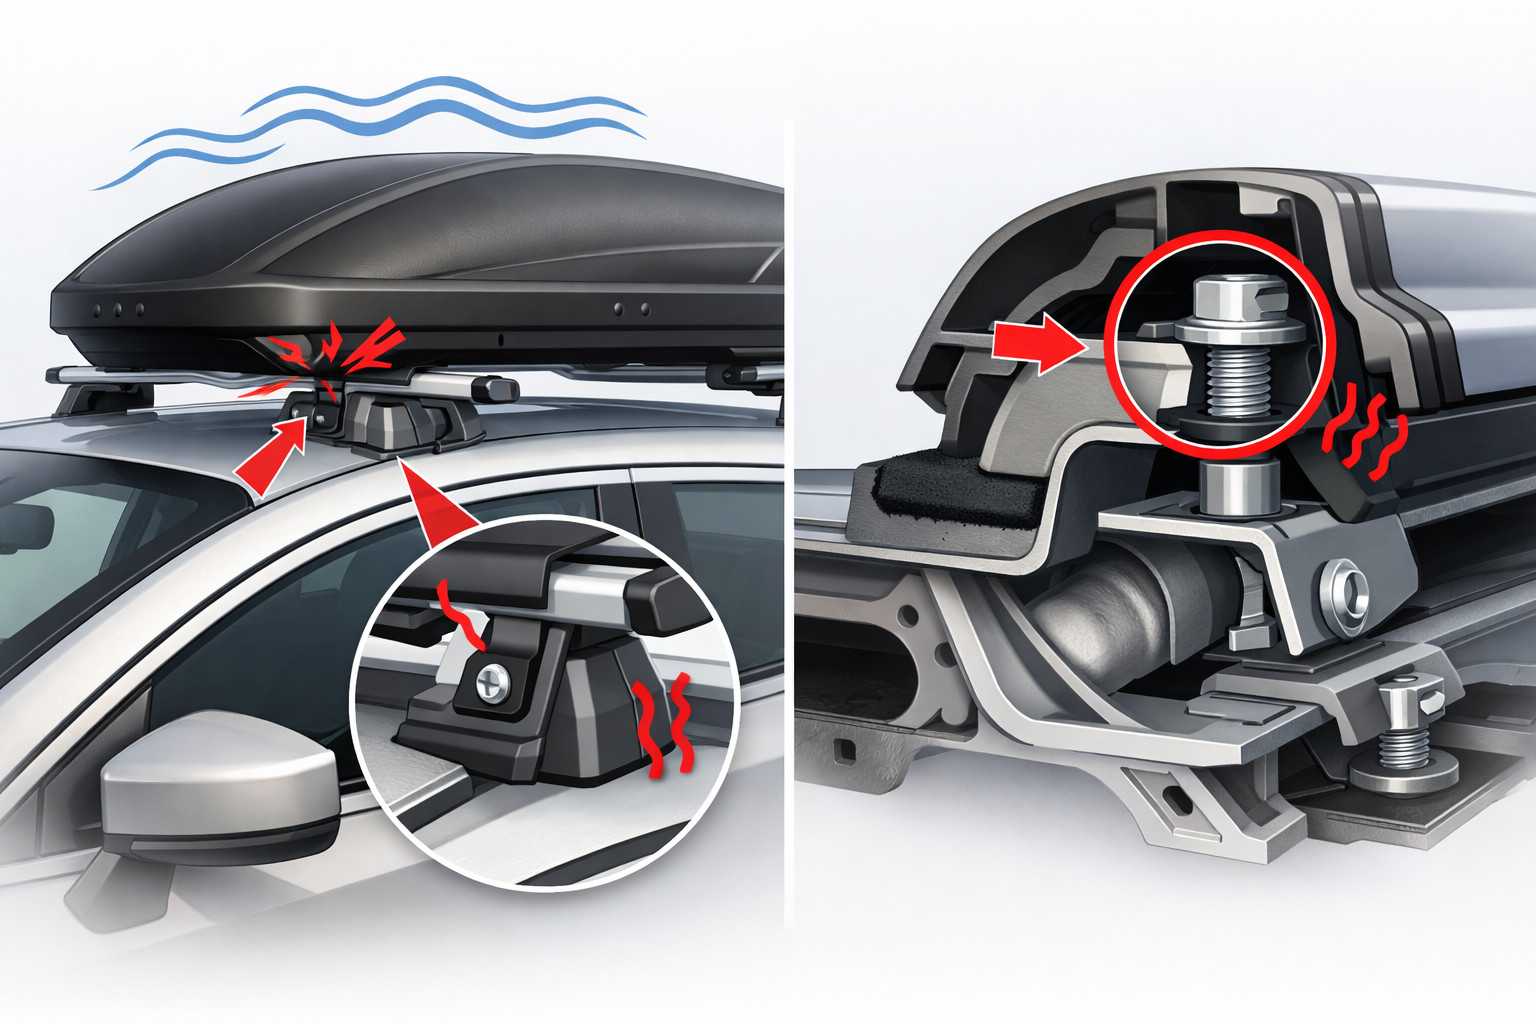
Next, check the mechanics. Inspect holes, brackets, and plastic parts for cracks, scuffing, and stretched mounting seats. Put a mark across the nut and bracket: if the mark shifts after a trip, the joint is working itself loose. After installation and after the first 100–160 km, the fasteners must be rechecked, and if you had rough roads—check again immediately.
If the problem appears only on the highway, look for either a short base or loosened bolts. If the ladder moves forward under braking, it almost always means you’re missing a mechanical stop. If after winter the straps become stiff, buckles jam, and there’s dirt or ice in the clamp areas, the cause is often not the ladder itself but degradation of the securing hardware.
DD Tuning expert comment: The most common mistake is counting only the ladder’s weight and not factoring in the roof rack’s weight and the dynamic loads while driving. The second typical mistake is tightening the mounts once and never checking them again after the first kilometers. If there are already signs of shifting or scuffing on the roof, you first need to correct the base and support points, not just add another strap.
| Symptom | Likely cause | What to do |
|---|---|---|
| Rattling or vibration at speed | Loose bolts or too little distance between supports | Stop, check tightening to the specified torque, assess the spacing between crossbars |
| Ladder slides forward under braking | No stop or guide, weak front fixation | Add a rigid stop and secure it with proper tie-down straps |
| Load “walks” sideways in crosswinds | Single tie-down point, weak lateral stabilization, speed too high | Use two fixation points, reduce speed, check the ladder’s position on the crossbars |
| Scuffs or dents on the roof | Ladder partially rests on the body or the system is overloaded | Move the load so it rests only on the roof rack, check the total weight of the entire system |
| After winter, clamps work worse | Dirt, ice, corrosion, worn straps or buckles | Clean and service the joints, replace straps or damaged parts |
Accessories make sense when they address a specific weak link: adding support, a rigid stop, or proper attachment points. But if you have an overload, a bent bracket, or a mismatch between the roof and the rack, you first need to fix the base configuration.
Replace straps, buckles, brackets, or a crossbar immediately if there are cracks, rust, stretched holes, signs of slipping, or repeated loosening after correct installation. But if the mounts are in good condition and the issue appears only at very high speed or in strong crosswinds, sometimes it’s cheaper and smarter to change driving habits rather than rebuild the entire system.
| Solution | When it works | When it’s not worth spending money |
|---|---|---|
| Vehicle-specific roof rack or correct crossbar support | When the current system doesn’t fit the roof or has a weak base | When the roof limit is exceeded or the body is already damaged |
| Ladder stop or guide | When the load slides forward or backward during braking | When the roof rack itself already has play at the mounting points |
| New straps and functional buckles | When old tie-downs are worn, stretched, or don’t lock properly | When they’re being used to compensate for overloading or a crooked installation |
| Torque check and scheduled inspection | When the mounts are technically sound but operate under vibration and after first installation | When there are cracks, deformation, or stretched holes—then repair or replacement is needed |
| Replacing individual brackets or a crossbar | When one component is damaged but the whole system still matches the vehicle | When the entire configuration is flawed from the start and it’s easier to switch to a different kit |
From a customer’s experience: a van owner complained that the ladder started humming on the highway and shifted slightly forward after hard braking. During inspection it turned out the support points were too close to each other, and one mounting joint had already loosened. After switching to the correct crossbar base, installing a rigid front stop, and rechecking after the first trip, the problem disappeared without over-tightening the straps.
To avoid losing a ladder on a van roof, you need to look not at a single strap but at the whole system: rack-to-vehicle compatibility, spacing between crossbars, the presence of a mechanical stop, torque control, and your driving conditions. In most cases the root cause is found quickly: either the fasteners are loosening, or the load lacks proper support, or someone is trying to hold it with friction without proper fixation.
This material is based on real fitting experience, hands-on practice, and real-world usage scenarios: they show that reliability doesn’t come from “tightening harder,” but from a correctly assembled system and regular checks after installation, after the first trip, and after tough road conditions.
Shipping to EU
Wholesale and retail
Own warehouse
Опис продукту
Подарунки не надаються при оформленні покупки у кредит під 0,01% або при покупці частинами.