


02.09.2012
2793
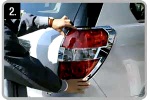
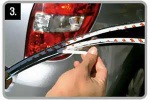
Have you already bought chrome trim for Sprinter or another car? Then you will probably be interested in learning how to do tuning with your own hands, without going to a specialized salon.
All steel accessories intended for exterior styling of cars are mounted on the body using American 3M adhesive tape, the properties of which we wrote in detail in the article " Car tuning: what to attach chrome lining to? ". It is already included in the product kit and allows you to do the tuning yourself with minimal labor. So let's get started...
IMPORTANT: 100% adhesion to the surface is achieved after 3 days, so during this period it is undesirable to wash the car and expose the product to shock and mechanical stress.


Shipping to EU
Wholesale and retail
Own warehouse
Опис продукту
Подарунки не надаються при оформленні покупки у кредит під 0,01% або при покупці частинами.

