16.03.2026
819
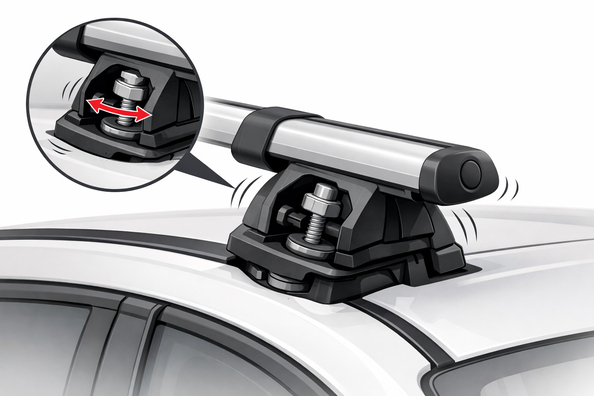
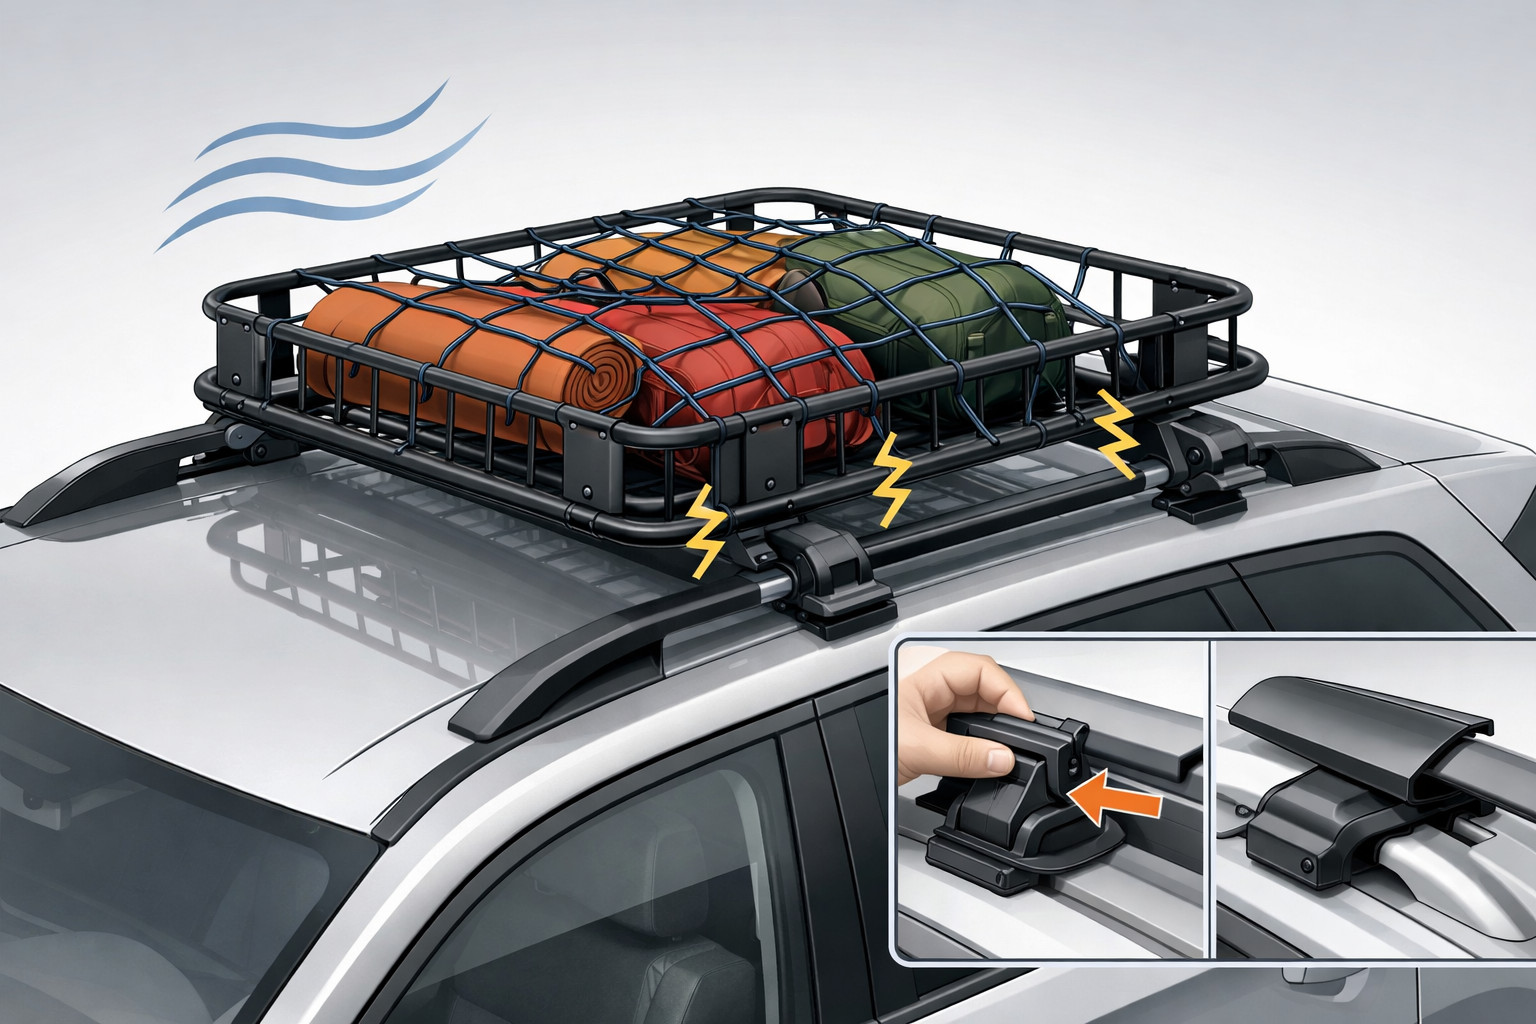
Play in a roof rack mounted to factory points (rails/trim strips/fixpoints) is not “normal vibration” — it’s a sign the assembly isn’t tightened enough, is misadjusted, or isn’t seated the way the design intends. If you keep using it, the mount can start shifting under load and vibration — up to a dangerous detachment.
Before a mount lets go, do a quick check: stop driving with cargo, inspect all fit kit/clips/retainers, tighten within the torque values from the manual (if you have a torque wrench), and do a hand-movement test. Below is why it happens, how to pinpoint the cause, and what actually makes a real difference.
Play appears when there isn’t a stable contact area between the rack “towers/feet” and the factory roof point, or when the assembly hasn’t been brought to the correct clamping force. In practice, it shows up as rattling/knocking at speed, noticeable movement when you try to shake the crossbar or fixpoint, and sometimes as shifting while driving.
Often it looks like a minor issue right after installation, but the root cause can be systemic: from wrong parts (the wrong fit kit or a missing component) to different clamping force on the left and right tower, where the mount “floats” from micro-vibrations.
1) Fasteners not tightened enough or tightened “by feel”. Many systems require specific torque values. If tightening is insufficient, the assembly behaves like a spring layer and starts to move under load.
2) Incorrect seating/orientation of parts in tracks or on fixpoints. If a crossbar or its clip is installed in the wrong channel/direction, part of the force doesn’t go into the clamping plane — causing noise and movement.
3) One fastening component is missing or the wrong kit is used. Even a “small” thing (for example, a missing bolt/clip/seal) often creates noticeable play: the remaining mounting points can’t compensate for the misalignment.
4) Uneven adjustment of cams/towers. In systems where clamping must be brought to a defined state, play occurs if on one side the cam/eccentric isn’t fully “closed” yet, or the tension differs side to side.
5) Dirt, moisture, wax on the roof contact area. On a wet or waxed surface, assemblies can slip after installation, and the play returns even after re-tightening.
Step 1. Separate real play from a “sound” effect. Grab the crossbar near each tower and push/pull in different directions. If the feet move noticeably or one tower clearly “plays” — the issue is in the mounting or seating, not just aerodynamic noise.
Step 2. Check completeness and correctness of the mounting hardware. Compare what’s installed to all elements in your fit kit: required clips, pads/seals, straps, stops, and mounting bolts/screws. If you’re unsure, it’s better to remove and verify.
Step 3. Do a torque check. If the manual specifies N·m, use a torque wrench or the supplied tool from the kit. For example, Thule Fit Kit 3101 specifies different torques for certain bolts/assemblies (including 2.5 N·m and 6 N·m), and Thule Roof Bar Kit 187055 also uses different values for different parts. The exact numbers must match your specific kit.
Step 4. Check clamping/adjustment uniformity. If your system uses cams/eccentrics or “tighten alternately” procedures (as in some Q-tower feet), the tension must be brought up evenly. Don’t try to “crush down” one side — that often creates misalignment and even more play.
Step 5. Assess the contact area. If the roof is wet/damp or has wax/polishing residue, the feet can slide. Then the logic is simple: clean, fully dry, and reinstall.
Step 6. Recheck after a short drive. Even when everything is assembled correctly, sometimes a real-world check is needed. For some systems, an inspection after a short period of use is officially specified (for example, “after 50 km” — to ensure the rack hasn’t loosened).
| Symptom | Likely cause | What to do |
|---|---|---|
| Rattle/knock at speed, and play is noticeable by hand | Fasteners not tightened enough or one fixing element is missing | Stop using it under load, check kit completeness, tighten assemblies to the torque from the manual, and repeat the hand test |
| Play is localized to a specific tower/side | Uneven clamping adjustment (cam/eccentric) or seating misalignment | Set clamping evenly: make alternating corrections and recheck until the play disappears |
| The mount “floats” or shifts after installation, especially on a wet roof | Dirt/moisture/wax under the feet | Remove, clean and dry the contact area, reinstall and tighten the normal way |
| Noise/vibration while driving, but hand play is slight or “somewhere else” | The crossbar or elements are installed in the wrong direction/channel | Verify orientation per the manual, reinstall so contact and clamping are in the correct plane |
| The issue appears after “re-tightening” without torque control or after seasonal installation | Tightening without reaching the required torque/adjustment | Redo installation with torque control and clamping adjustment; don’t limit it to “just a bit tighter” |
1) Fix the real cause, don’t mask it. If the issue is a missing bolt/component — replacing it removes the play. Practical point: play isn’t caused by “nuts backing off”, but because the assembly is physically not built as it should be.
2) Bring the fastening to the required torque. The approach is simple: a torque wrench or the supplied tool per the manual. For many systems, torques differ between bolts (for example, in Thule Fit Kit 3101 and Thule Roof Bar Kit 187055), so one “universal” number is a mistake.
3) Correct clamping adjustment following the procedure. Where cams/towers are used, tension must be brought up evenly. If the system requires sequential corrections (like “1/4 turn alternately”), that’s what removes misalignment and play.
4) Cleaning and drying the mounting surfaces. If the roof is wet or waxed, even perfect tightening may not hold. Cleaning/drying and reinstalling often restore stability.
5) Check after a short drive. This isn’t a “random test” but a quick way to catch cases where the assembly hasn’t gone through initial stabilization yet.
If you’re installing a rack into factory points, it’s useful to review the general installation algorithm: roof rack in factory mounting points.
1) “Tighten a bit more” without torque control. This often reduces play for a few trips, but if the assembly hasn’t been tightened to the required value or is seated incorrectly, it will still keep working with micro-movement.
2) Loctite/locknuts/straps as a substitute for correct installation. They can damp vibrations, but they don’t guarantee correct seating and clamping. In the worst case, you can end up with misalignment or damage to components.
3) Re-tightening on a dirty or waxed roof. If the issue is sliding at the contact surfaces, “over-tightening” won’t remove the cause — the play will return.
4) Ignoring missing fit kit elements. If one bolt/clip/pad is missing, the whole system operates with a defect. Chemicals and “wraps” won’t fix that.
Accessories or replacement make sense when you’ve already confirmed the basics: correct kit, correct seating, and correct clamping force. Then additional solutions can reduce minor vibrations or protect against repeat slipping.
Practically: if inspection shows a seal/pad has lost elasticity or a required element is missing, replacement is logical. But if the cause is wrong orientation or insufficient torque, any “add-ons” will be a temporary compromise.
As an example of why the specific kit matters, in systems like Thule Rapid Fixpoint XT Kit, for some batches after a certain date there was an official check for detachment risk — cases like that are not solved by “tighten it again”.
| Solution | When it works | When it’s not worth spending money |
|---|---|---|
| Reinstall with the correct fit kit/clips and all fasteners in place | When play appears after installation or there’s suspicion of missing/incorrectly configured elements | If completeness and seating are already proven correct, but the problem is only uneven clamping — then the priority is different |
| Tighten to the manual torque (with a torque wrench/supplied tool) | When the cause is under-tightened assemblies or “tightened with the wrong force” | If the roof is wet/waxed and there is slipping under the feet — without cleaning the effect is short-lived |
| Proper cam/tower adjustment per procedure (even alternating corrections) | When play is localized on one side or there are signs of uneven clamping | If play is caused by missing parts or wrong crossbar orientation — eliminate those factors first |
| Clean and dry the roof contact area + reinstall | When play returns after installation on a wet/waxed roof or there are traces of oils/polish | When the contact is clean and the play is caused specifically by under-tightening or missing hardware |
| “Anti-vibration” chemicals/grabbers (Loctite, locknuts) instead of proper tightening | May temporarily mute minor rattles if the assembly is generally built correctly | If torque, clamping force, or seating are not confirmed — this usually doesn’t solve the root cause |
| Replace damaged/incorrect elements (pads, fasteners, fit kit parts) | When a completeness mismatch is found or a part is worn/damaged | If the cause isn’t the parts but incorrect installation or clamping calibration |
Play in a roof rack mounted to factory points is primarily an installation issue: under-tightened assemblies, incorrect seating/orientation, missing fixing elements, uneven clamping, or slipping due to dirt/wax/moisture. Stop using it under load immediately, perform a hand test near each tower, verify completeness, and tighten within the torque specified in the manual.
If, after cleaning the contact area, correct seating, and proper clamping, the play doesn’t go away, the cause may be mismatched parts or a design compatibility issue for your specific kit/vehicle. In that case, spend money only on what removes the confirmed cause, not on “universal” chemicals: start by reviewing the installation algorithm in roof rack in factory mounting points.
Shipping to EU
Wholesale and retail
Own warehouse
Опис продукту
Подарунки не надаються при оформленні покупки у кредит під 0,01% або при покупці частинами.