20.09.2026
154
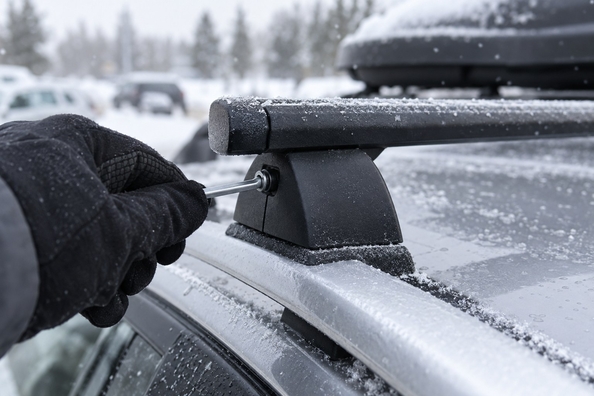
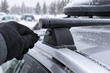
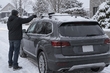
Before winter, you should check five things on roof rails and crossbars: the tightness of the fasteners, the condition of bolts and clamps (corrosion, cracks), the rubber pads and the clamping strip, the locks, and the roof load limit with a margin for snow. The limit is set by the car manufacturer, not the crossbars: the manual says the lower of the two applies, and it includes the crossbars themselves, the roof box, and the cargo. Typical 50–100 kg for a passenger car is a range, not the standard for your model: in ADAC examples you can find 25 and 35 kg as well.
Contents
First, determine what exactly you have on the roof: raised rails with a gap above the roof, integrated rails (no gap), factory mounting points, or a smooth roof. What you need to inspect depends on this. On raised rails with a gap, crossbars are held by clamps on the rail profile; on integrated rails, by special supports; at factory points, by bolts into the roof. Roof rails and crossbars are different things: the former run along the roof, the latter across it, and a box, basket, or skis are mounted on the crossbars, not directly on the rails.
In its manuals, Thule requires you to make sure before every trip that all handles, bolts, screws, straps, and locks are securely tightened, and periodically to inspect them for wear, corrosion, and metal fatigue. For winter, that implies the following inspection:
It is better to tighten gradually, alternating both sides, using the key from the kit rather than by eye. If the rails are glued on rather than bolted, you should not load them with a roof box or basket until you have checked the manual to confirm they are intended for that. Some glued-on rails are decorative. We wrote separately about wind noise and crossbar play at speed: why a rack hums on standard rails after 90 km/h and what to check.
Rubber on crossbars and rails performs worse in frost than in warm weather: it hardens, cracks, and shrinks. Inspect:
The permissible roof load is not listed in the registration certificate: only the car’s manual provides it. ADAC explicitly states that the registration document lists only gross vehicle weight and axle loads. The figures vary even within the same class. In an ADAC table, for example: Dacia Sandero—80 kg, Honda Jazz hybrid—35 kg, Ford Puma hybrid—25 kg, and a Mercedes-Benz Sprinter van—300 kg. TÜV SÜD cites a typical range of 50–100 kg for passenger cars; in an older material—30–100 kg. So rely only on your manual and on the lower of the limits: car, crossbars, roof box.
The roof limit includes everything on it. Thule gives the formula: weight of the crossbars plus weight of the roof box plus weight of the cargo. TÜV SÜD cites roughly 20 kg for a box and about 5 kg for crossbars. A calculation using a conditional example (75 kg limit is for illustration, not a standard):
| Item | Weight, kg | What remains of the 75 kg limit |
|---|---|---|
| Roof limit per the car manual (example) | 75 | 75 |
| Crossbars (approx. per TÜV SÜD) | 5 | 70 |
| Roof box (approx. per TÜV SÜD) | 20 | 50 |
| Skis, snowboards, items in the box | up to 50 | 0 |
That means for such a roof, only about 50 kg remains for the actual cargo, and snow, ice, and wet items in the box eat into that reserve. ADAC separately warns that cargo that absorbs water (for example, large towels) becomes heavier. The box has its own cargo limit as well, which must not be exceeded. You can raise the roof limit only through a technical inspection (TÜV, Dekra) with confirmation from the car manufacturer, not by buying “stronger” crossbars.
An additional reason not to load up to the limit in winter is the car’s handling. Thule emphasizes that with rails and crossbars, height changes, sensitivity to crosswinds, braking, and cornering behavior change—especially when the roof is loaded—and that speed must match the load and road conditions and must not exceed 130 km/h for Thule boxes. On slippery roads, this is felt even more.
Snow weight depends on density, and it can differ by several times. According to a table by the Omni Calculator service: fresh snow—about 60 kg/m³, settled—250 kg/m³, wind-packed—375 kg/m³, very wet—750 kg/m³. Sources give different ranges, so these are reference points. Our own calculation for the top of a roof box with an area of about 1.4 m² (roughly 175 × 80 cm) and a 10 cm layer:
| Type of snow | Density, kg/m³ | Weight of a 10 cm layer on the box, kg |
|---|---|---|
| Fresh | 60 | ≈ 8 |
| Settled | 250 | ≈ 35 |
| Wind-packed | 375 | ≈ 53 |
| Very wet | 750 | ≈ 105 |
In our example, a settled layer of snow eats up 35 kg out of the 50 kg cargo reserve. So the rules are simple: before driving off, sweep snow off the roof, box, and crossbars with a soft brush (ideally with a telescopic handle), do not chip ice with a scraper on plastic, and do not drive with an icy “cap” on the roof: on the road it shifts and falls onto the car behind. If the box stays on the car all winter, it is better to keep the load in it with a margin from the limit. For the boxes on the site that are currently in the catalog, see the roof boxes section.
Skis, a snowboard, and a bicycle are mounted on compatible crossbars using the appropriate mount, not directly on the rails. This matters for winter: a ski carrier is designed for a specific crossbar profile, and the mere fact that it is “on rails” is not enough—match the profile, slot, and width. We have collected ski mounts for crossbars in the ski carriers section.
Thule explicitly requires removing crossbars and accessories before an automatic car wash and when they are not in use. This is straightforward: crossbars without a load add air resistance and noise, and the brushes of an automatic wash can easily catch the tracks and the box. According to the manual, a roof box is cleaned with a solution of water and a regular household detergent without alcohol, bleach, or ammonia, and household interior sprays are not suitable for the box plastic. If you cannot avoid a self-service wash, keep the nozzle no closer than 30 cm and direct the jet along the profile; we wrote in detail about drying joints and temperature in the article car washing in winter and tuning.
If you remove the crossbars for the season, store them like this:
If you need new crossbars for standard rails, see the roof rack for standard rails section, and model-specific rails for a particular car—in the roof rails section. Before ordering, confirm compatibility with your generation, body style, and roof type with a manager: a universal profile does not make the supports universal.
We deliver via Nova Poshta across all of Ukraine.
Shipping to EU
Wholesale and retail
Own warehouse
Опис продукту
Подарунки не надаються при оформленні покупки у кредит під 0,01% або при покупці частинами.