20.05.2026
270
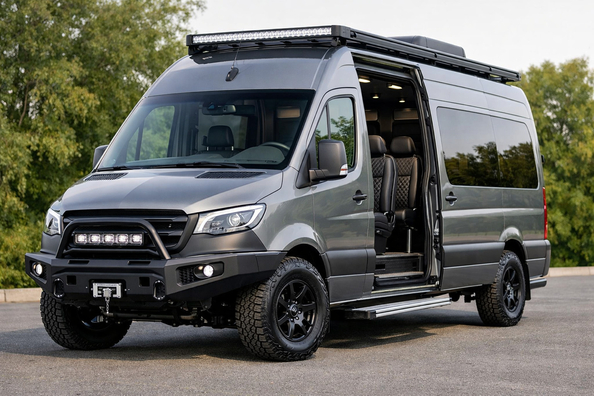
This starter upgrade plan for the Mercedes Sprinter W907/W910 is for those who carry people every day: transfers, corporate routes, big-family trips, intercity runs. The goal isn’t to dress the van up, but to make it quieter, more stable, and less exhausting for the driver and passengers from the very first stage.
With a passenger Sprinter it’s easy to go the wrong way: multimedia first, trim panels, expensive exterior accessories—and only then tires, noise, and body roll. For a nearly 7 m long body, with a gross vehicle weight up to 4300 kg and a 15-seat use case, that’s a mistake. The right start here is simple: tires and pressure matched to the actual weight, local noise and vibration insulation, suspension tuned to the real load—and electronic assistants only after that.
In this scenario, the upgrade has to solve three things: reduce noise in a large body, remove excessive rocking over waves and in crosswinds, and make maneuvering a long van in the city easier. For the passenger version, this is what you feel every day—not decorative overlays or a flashy cabin picture.
The result depends on how the specific van is used. If it often runs full and does highway work, the priority is tires, pressure, shocks, and stability. If it’s city transfers—courtyards, hotels, airports, and frequent reversing—camera and visibility control move up sooner. If the van is lighter and not under constant load, overly stiff suspension choices can make the ride worse.
The first step isn’t tuning in the usual sense, but bringing the vehicle into proper working condition for its real weight. On a Sprinter, a mistake with tires or pressure can easily cancel out the effect of all the spending that follows.
Until these three points are covered, spending on multimedia, expensive trim, or exterior decor almost always delivers a weaker effect than the owner expects.
| Upgrade | Why it’s needed | Who it really benefits |
|---|---|---|
| Tires with the correct load index and pressure by axle load | Stabilize the van’s behavior, improve braking, remove some nervousness and uneven wear | Everyone without exception, especially with a full cabin or regular intercity runs |
| Local noise and vibration insulation of arches and large panels | Reduces tire roar, the body’s “drum” effect, and passenger fatigue on long trips | Those who carry people daily and want a noticeable effect without extra weight |
| Rear shock absorbers | Reduce rocking, rear-end bouncing, and unpleasant reactions over waves | Vans that regularly drive under load or on the highway |
| Rear anti-roll bar or moderate spring inserts | Add composure if, after the first stage, the vehicle still leans or floats | Those who still have the problem after tires and shocks |
| Rear-view camera, surround view, blind-spot monitoring | Make maneuvers with a long body easier and reduce the risk of minor urban incidents | City transfers, hotel shuttles, routes with tight parking |
| Under-seat space planning | Helps avoid conflicts with the PSM module, heater, power supply, or audio blocks | Those preparing additional electronics, sound, or auxiliary equipment |
DD Tuning expert comment: the most common Sprinter mistake is buying a stiffer suspension or expensive multimedia before weighing the van and checking the tires. The second typical story is taking up all the under-seat space with audio, then discovering you also need to place a service module, heater, or auxiliary power there. In practice, the right sequence almost always saves more than a ready-made tuning package.
The second stage starts only after a short test on a real route: with passengers, luggage, and your usual speed. If after tires, pressure, and rear shocks the van still feels loose at the rear, then it makes sense to look at a rear anti-roll bar or moderate spring inserts. But not the other way around: on a light-duty or city Sprinter, excessive stiffness often only ruins the ride.
This is also the logical point to add visibility systems and driver assistance. For an almost seven-meter body with a large turning radius, a rear-view camera, 360-degree view, or blind-spot monitoring brings real benefits in daily work. If the van mostly runs the highway and parks in easy conditions, this isn’t the first priority—it’s the second.
Also at the second stage, it’s worth sorting out the electronics layout. The under-seat area in a Sprinter is often needed for service modules, power, or heating, so an amplifier, extra modules, or other equipment should be planned before installation, not after.
The “nice but not critical” block includes interior accessories, entry-area protection, seat covers, extra lighting, trim pieces, and small driver-area improvements. On a passenger van, they make sense when they simplify cleaning, reduce wear in the boarding area, and don’t steal usable space.
Exterior upgrades need to be filtered even more strictly. Roofs on these bodies have weight limits, and sliding doors don’t like heavy add-ons or overloaded trim. So rails, cargo solutions, large exterior elements, and especially heavy decor make sense only when there’s a real task—not just a desire to fill a big body with accessories.
If you want a better look, choose what doesn’t harm function: practical interior solutions, neat sill protection, and clean elements in high-contact areas. Visual details should come after the van is already quieter on the road and no longer rocks.
Most often, money is wasted on things that look great on a work list but barely change daily use. The first mistake is buying the wrong tires or leaving pressure random, then trying to fix the behavior with expensive suspension parts. The second is ordering full-coverage soundproofing of the entire body instead of focusing on arches and resonant panels.
The third typical story is an overly stiff anti-roll bar or suspension kit on a van that doesn’t run full-time loaded. The fourth is a big multimedia system ahead of a camera and real rear visibility. The fifth is heavy roof or door accessories without calculating the mass including mounts. In the end, people overpay for looks and get less benefit than they could from a basic but correctly assembled starter set.
| Area | Install first | Can be postponed | Optional |
|---|---|---|---|
| Handling and wear | Tires with the correct load index, pressure after weighing | Rear suspension upgrades after a test under real load | Wheels, hubcaps, decorative wheel elements |
| Acoustic comfort | Arches, front floor, large flat panels | Extra layers in secondary zones if the first stage already delivered results | Full heavy insulation of the entire body |
| City maneuvering | Camera or another solution for rear visibility if reversing is frequent | Surround view, digital mirror, blind-spot monitoring | Large passenger screens if the task is purely work-focused |
| Interior and daily use | Entry-area protection, practical small items that reduce wear and dirt | Seat covers, extra light, secondary accessories | Decorative overlays purely for looks |
| Roof and exterior elements | Nothing until the mass is calculated and the real need is clear | Functional solutions for a specific transport scenario | Heavy decor that eats into the payload margin |
More expensive solutions make sense not when you want a full options list, but when the van genuinely earns money from daily passenger work. If the interior wears heavily, it’s worth looking at Sprinter interior accessories—but only those that protect contact areas, simplify cleaning, and don’t interfere with boarding.
If the route is courtyards, terminals, hotels, and constant reversing, a more expensive visibility solution is truly justified. In that case it’s logical to look at the cameras section, because it’s not about a wow effect, but about less stress for the driver and faster work in tight places.
A separate topic is additional modules, control, power supply, and integration of auxiliary systems. Here, more expensive equipment is justified only after checking the layout and electrics of the specific van, so it’s worth starting with the dedicated category electronics, not with random universal kits.
From a client’s experience: for a passenger Sprinter used for regular transfers, they initially wanted to install a large multimedia package and full trim. After weighing and testing the route, they limited it to the right tires, local arch sound insulation, and rear shock absorbers, and added the camera as a second stage. As a result, the driver gets less tired, and passengers felt the difference even before any “pretty” upgrades.
For a starter upgrade of the Mercedes Sprinter W907/W910 in a passenger-use scenario, the logic is simple: first the basics you feel every day, then targeted improvements for your route, and only after that comfort or exterior add-ons. First should be tires and pressure, then local work on noise, then suspension tuned to the real load, and only after that—visibility systems, electronics, and small interior items.
This approach may not look the flashiest, but it works best in real life. This material is based on real selection experience, hands-on practice, and real use cases where what matters isn’t a pretty options list, but a tangible result in the day-to-day operation of a passenger van.
| ✔ | The first priority is the basic things that really affect everyday driving: tires, pressure, noise, and suspension tuned to the actual load. This gives a noticeable result even before expensive upgrades. |
| ✔ | Local sound and vibration insulation is done selectively on the wheel arches, floor, and large panels, not across the entire body. That means less unnecessary weight and cost, but more benefit for passenger comfort. |
| ✔ | The approach takes into account the van’s real working scenario: full load, highway driving, city transfers, or frequent reversing. This makes it possible to set priorities without unnecessary purchases. |
| ✔ | Special emphasis is placed on the rear shock absorbers and, if needed, a stabilizer only after a route test. This helps avoid making the suspension too stiff on a light or city van. |
| ✔ | Attention is given to the layout of the electronics and the under-seat space before installation. This reduces the risk of conflicts with control modules, power supply, or heating. |
| ✘ | The material almost does not give quick, “beautiful” changes to the interior at the start, because the multimedia system, trim, and decor are recommended to be left for later. For those who want a visual effect right away, this may seem like a slow path. |
| ✘ | To set the tires and pressure correctly, the van needs to be weighed in working condition. This adds another mandatory step before the upgrade and makes the start less simple than it seems. |
| ✘ | Some solutions have to be tested in stages: first tires, then shock absorbers, and only after that a stabilizer or air chambers. Because of this, you won’t be able to cover everything with one purchase. |
| ✘ | There is a risk of making the ride worse if you immediately install a too stiff suspension or excessive sound insulation. For a lighter or city Sprinter, such solutions are directly called undesirable. |
Shipping to EU
Wholesale and retail
Own warehouse
Опис продукту
Подарунки не надаються при оформленні покупки у кредит під 0,01% або при покупці частинами.