24.07.2026
189
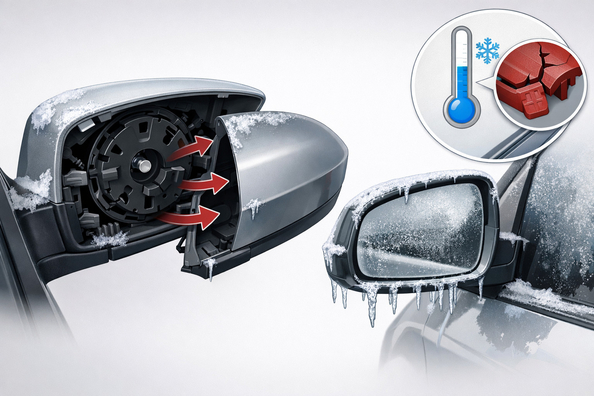
After a frost, mirror caps start to wobble not because the cold itself “unglues” the part, but because it finishes off an already weak spot: an unclipped clip, a cracked internal support, a fitment gap, or incorrectly applied double-sided tape. If pressing on the mirror housing or the glass makes the noise or play disappear, the source is almost certainly within the mirror assembly.
It’s important not to confuse two different cases here: a decorative cover on tape, and a mirror cover held on clips. In the first case, the issue is more often surface prep and moisture; in the second, it’s brittle plastic, worn retainers, or an internal crack.
Winter simply makes visible what still held in warm weather. Plastic becomes less flexible in the cold, minor impacts from snow, a brush, or washing are tolerated worse, and water in gaps can freeze and spread the fit. Because of this, a cap that sat “on the edge” in summer starts to move, whistle, or lightly rattle.
Construction differences also matter. On some cars the cover sits only on clips; on others there’s also felt or foam to compensate for the gap. If that damper is worn out or was missing after a previous repair, frost only speeds up the appearance of play.
DD Tuning expert comment: the most common mistake is trying to force a skewed cap back in place in freezing weather or immediately putting it on superglue. If the clip hasn’t seated in its slot, brute pressure just snaps the tab. The second typical misstep is gluing over old tape or onto a damp surface: it seems to hold on the outside, but after the first frost the edge starts moving again.
| Symptom | Likely cause | What to do |
|---|---|---|
| One corner of the cap wobbles | Broken clip or internal tab | Remove in warmth, check retainers, replace the damaged element |
| Whistling or rattling at speed | Gap between the cover and the bracket, missing damper | Eliminate play with thin felt or foam at the needed point |
| After a thaw, the play is greater than in dry frost | Moisture or condensation in the joint, weakened adhesive | Dry out, degrease, reinstall the cap or re-tape it |
| The cap seems to hold, but the edge lifts | Old or poorly applied double-sided tape | Completely remove the old layer and reapply with automotive acrylic tape |
| The entire mirror housing moves | The issue isn’t the cap, but the base or mechanism | Check the mirror assembly itself; a local cap repair won’t help |
An accessory makes sense where the base is intact. If it’s not the cap that’s broken but the carrier itself or the mirror mechanism, a new decorative part won’t fix the problem.
| Solution | When it works | When it’s not worth spending money |
|---|---|---|
| Reinstall the cap on clips | Clips are intact; the issue is misalignment or incomplete seating | If at least one retainer or support is broken |
| Add felt or foam at the play point | There’s a small gap and noise at speed | If the cap is actually lifting or cracked |
| Re-tape with acrylic tape | For a decorative cover on a flat, clean, dry surface | If the part is installed in the cold, or if only adhesive is holding instead of broken fasteners |
| Temporary local gluing | To get by until replacement when the crack is small | As a permanent solution for a unit with an internal break |
| Replace the cap or the complete mirror assembly | There are cracks, broken tabs, large play, or a damaged base | If the cause is only dirt, moisture, or incorrect seating |
From a customer’s experience: after the first hard frost, the front edge of the cap started to move, and the owner was already planning to glue it. After disassembly in a heated garage, it turned out the old tape had been applied over leftover dirt, and one edge simply hadn’t been pressed down properly. After proper cleaning, warming the part, and reinstalling, the play disappeared without replacing the entire mirror.
If the mirror cap started to wobble after frost, the first step is not to glue it, but to pinpoint the source: a clip, a gap, moisture, old tape, or an already cracked support. In most cases, either correct reinstallation in warmth, proper adhesive installation, or an honest replacement of the broken part works.
This material is based on real experience in selection, repair practice, and real-world use cases: where the assembly is intact, correct fitment and materials are enough; where the internal part is broken, gluing only postpones replacement.
Shipping to EU
Wholesale and retail
Own warehouse
Опис продукту
Подарунки не надаються при оформленні покупки у кредит під 0,01% або при покупці частинами.