24.09.2026
274
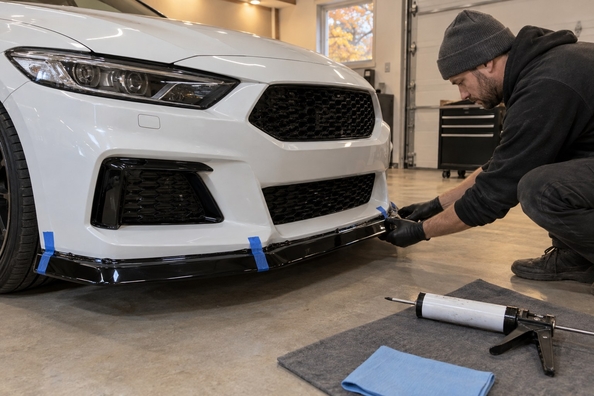
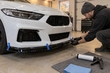
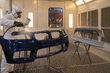
Painting and installing a body kit in autumn and winter is possible, but only in a warm, dry помещение: paint manufacturers set the lower application limit at +10…+15 °C, and the drying time in their data sheets is рассчитан for a part temperature of about +20 °C. 3M polypropylene adhesion promoter is recommended to be applied at +15…+30 °C, 3M VHB double-sided tape — bonded no lower than +10…+15 °C, polyurethane adhesive sealants like Sikaflex-221 — from +5 °C. So the autumn plan is simple: test fit without paint, paint in a booth, let the clear coat dry completely, and install there in the warmth. Below are the figures from technical data sheets and the difference between a polypropylene bumper and an ABS lip.
Contents
Yes, and many people install a body kit именно in autumn: the car is driven less, and by spring the part is already installed and painted. There is only one limitation: all work must be done indoors, where it is warm and dry. Paint, clear coat, primer, and adhesive do not care what season it is outside; what matters is the temperature of the air and of the part itself at the moment of application and while the material is drying.
The most common mistake in autumn is to bring a cold car or part from storage into the booth and start work right away. The air is already warm, but the bumper is still cold. Condensation settles on a cold surface from warm air, and the primer goes onto a влажный film. Therefore, the part must first warm up to the room temperature — according to the data sheets, you should ориентироваться on the temperature of the object, not the air.
We covered the general rules for bodywork painting a bumper in the article “Body repair from A to Z: Painting a bumper”. Here — only what changes in the cold season.
There is no single number for all materials: each product has its own limit, and it is stated in its technical data sheet. But the order of magnitude is the same across manufacturers.
| Material (manufacturer) | What the manufacturer says about temperature | Other conditions from the data sheet |
|---|---|---|
| 3M 05907 Polyolefin Adhesion Promoter (primer for PP) | Best results — when stored and applied at room temperature +15…+30 °C | Dries 10 min (EU data sheet) or 5 min at +21 °C (US); after each sanding down to bare plastic — apply again |
| Lesonal All Plastics Primer (AkzoNobel) | Flash-off between coats 5–10 min at +20 °C | Forced drying at +60 °C and infrared — not recommended |
| HB Body Bumper Paint | Do not use at temperatures below +15 °C | — |
| Mipa 2K-Klarlack CPE two-component clear coat | Apply from +10 °C | Relative humidity — up to 80% |
| Sikkens Autoclear LV two-component clear coat | Drying time is specified for the part temperature | Flash-off 5–10 min at +20 °C between coats and before drying |
Conclusion from the table: an unheated garage in autumn is not suitable, even if it is +12 °C outside during the day. Nighttime cools both the part and the room, and the clear coat is still drying during that time. Below the minimum specified by the manufacturer, the material is not applied at all: the paint levels worse, solvent leaves the film more slowly, and instead of an even gloss you can get orange peel, runs, and weak adhesion to the plastic.
Drying times in data sheets are always tied to temperature. Here are the figures from two manufacturers for a standard application.
| Clear coat | Part temperature | Dust-free | Touch-dry | Ready to install |
|---|---|---|---|---|
| Mipa 2K-Klarlack CPE | +20 °C | 30 min | 12 h | 24 h |
| Mipa 2K-Klarlack CPE | +60 °C | 5 min | 30 min | 2 h |
| Sikkens Autoclear LV | +20 °C | 45 min | 1.5 h | — |
| Sikkens Autoclear LV | +60 °C | 10 min | 20 min (after cooling) | — |
The main point is clear: even at room temperature of +20 °C, Mipa two-component clear coat needs a full day before installation, while drying in a booth at +60 °C reduces this time to two hours. The colder it is, the longer it takes: at +12…+15 °C, clear coat dries more slowly than in the table, and below the manufacturer’s limit it is not applied. That is why for a body kit in autumn, the best option is a paint booth with a drying режим, not just a “warm box”. Sikkens separately уточняет: after drying at +60 °C, the clear coat must fully cool down to room temperature; it can be polished примерно an hour after cooling.
A body kit consists of parts made from different plastics, and they are prepared for painting differently.
More on material properties — in the article “ABS, PP, FRP or carbon: which material to choose for a body kit, side skirts, and a spoiler”.
Many model-specific lips, diffusers, and spoilers are mounted using windshield polyurethane adhesive sealant — this is, for example, stated in the product pages for DPT ABS parts, and the adhesive is not included. Polyurethane sealants cure using moisture from the air, so in cold and dry air the process goes more slowly. For example, the common polyurethane sealant Sikaflex-221 is allowed by the manufacturer to be applied at temperatures from +5 to +40 °C, and the skin formation time and open time in the data sheet are given for +23 °C and 50% humidity.
It will, if it was applied in the warmth. According to 3M, the minimum application temperature for most VHB tapes is +10…+15 °C, and the ideal is +21…+38 °C. The tape builds strength gradually: about 50% after 20 minutes, 90% after a day, and 100% after 72 hours at room temperature. On a polypropylene part, the tape is applied over primer. We described in detail how to tape a spoiler in the cold season in the article “Spoiler on the trunk lid: will 3M tape hold in мороз”.
In autumn, you should plan a few more days for a body kit than in summer: some time is spent warming up the parts and allowing the clear coat to dry fully.
Also remember about freezing temperatures after installation: cold plastic absorbs impacts worse, and a part installed under tension pulls on mounts in the cold. More on this — in the article “Why plastic body kits and bumpers crack in the мороз”.
You can choose parts in the catalogs of body kit sets with full bumpers, “lip, diffuser, side skirts” kits, lip spoilers, diffusers, and spoilers. You can install a body kit at the network of certified DD Tuning service centers — your manager will point you to the nearest one.
We deliver via Nova Poshta across all of Ukraine.
Shipping to EU
Wholesale and retail
Own warehouse
Опис продукту
Подарунки не надаються при оформленні покупки у кредит під 0,01% або при покупці частинами.