13.08.2026
220
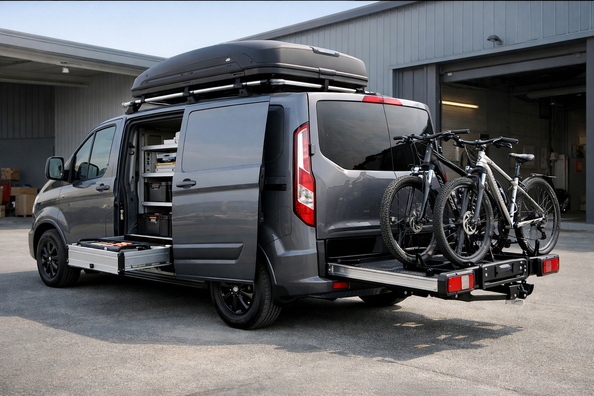
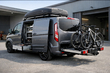
This upgrade plan is for a Ford Custom owner who daily hauls tools, boxes, consumables, long materials, or simply a lot of cargo and wants to quickly turn the van into a workhorse without unnecessary spending. The main goal here is not to "dress up" the vehicle with accessories, but to protect the interior and cargo area, secure the load properly, and not lose usable volume because of impulse purchases.
For Transit Custom and logically similar Custom versions, the approach is the same: protection and load securing first, then modular upgrades, and only after that—expensive solutions. Compatibility depends heavily on the generation, wheelbase, roof height, number of doors, and whether it’s a van, kombi, or passenger variant, so buying at random is especially unprofitable here.
In a business scenario, a Ford Custom should work as a tool, not as a showcase of accessories. Depending on the body, cargo volume reaches 5.8–9.0 m³, and payload varies greatly by version, so the idea of a starter upgrade is simple: don’t let cargo beat up the floor and side panels, don’t drag dirt into the cab, and don’t waste space on things that don’t work every day.
The second key task is long items. If your job involves pipes, profiles, rails, ladders, or packages close to 3 meters, the most valuable solution is not a big roof kit but a smart bulkhead or a load-through. It lets you carry long items without constant noise above, without extra weight on the roof, and without losing access to the compartment.
Start with what takes the daily wear. In the cargo area that’s rigid floor protection or a durable lining; in the cab—all-weather mats and seat covers. It may not look impressive in photos, but these are the things that save money first on detailing, minor repairs, and resale.
The second priority is cargo tie-down points. If the van doesn’t have a convenient securing setup, even light boxes start sliding on the floor, and expensive tools live their own life in corners. Rails, rings, bars, or at least a well-thought-out strap layout provide more benefit than fixed cabinets if your workflow hasn’t settled yet.
The third step is deciding how you’ll carry long items. If they come up often, a bulkhead with a load-through is almost always smarter than removing the bulkhead completely. You keep safety, get less cabin noise, and don’t force yourself to throw materials on the roof every time.
| Upgrade | Why it’s needed | Who really benefits |
|---|---|---|
| Rigid floor protection in the cargo area | Takes impacts, moisture, dirt, and abrasion from boxes and trolleys | Couriers, installers, service crews—anyone who loads the van daily |
| All-weather mats in the cab | Quickly collect water, sand, and dirt that would otherwise spread through the interior | Those who work on callouts, construction sites, and in bad weather |
| Seat covers | Reduce fabric wear and make cleanup after a workday easier | Vehicles with heavy daily use, teams with 2–3 people in the cab |
| Rings, rails, and straps for securing | Prevent cargo from hitting the body and allow quick changes to the loading layout | Those who carry different cargo: boxes, tools, home appliances, cases |
| Bulkhead or load-through | Lets you carry long items without compromising safety and without living with a permanent roof setup | Installers, furniture makers, those who work with profiles, pipes, rails |
| Proper lighting in the cargo area | Speeds up finding small items and loading in the dark | Couriers, 24/7 services, those who leave early or return late |
DD Tuning expert comment: the most common mistake with Ford Custom is buying a roof rack or cabinets before the vehicle has worked at least a few weeks in real conditions. The second typical issue is not accounting for the body generation, wheelbase, and roof type—so an accessory that "seems to fit" either doesn’t fit or works poorly. If your usage scenario is still fluid, choose modular securing and protection, not heavy fixed solutions.
Once basic protection and load securing are in place, the second stage is built around a recurring task. If you haul ladders, long pipes, or sheet material every week, then it makes sense to consider a roof system. If your main cargo is small tools and consumables, modular shelves or open-access sections are more logical—but only after measuring your actual inventory.
For kombi and passenger versions, it’s often smarter to organize internal cargo securing on the floor instead of constantly carrying loads outside. That means less noise, lower fuel consumption, and a lower risk that an expensive system sits empty most of the week.
Another sensible second stage is compartment lighting and small improvements to ease of access. These seem minor on paper, but in real work they reduce the time spent on every load.
In this group I’d include localized sound deadening for the floor and wheel arches, wind deflectors, cosmetic trim pieces, and some decorative exterior elements. Sound deadening makes sense if the van often drives empty or half-empty and the driver truly spends a full day in it. If the vehicle is constantly loaded and works in short city runs, the effect will be less noticeable than a well-organized compartment.
Appearance matters only where the vehicle is part of the service image: transfers, hotel trips, passenger or corporate runs. For a purely cargo scenario, spoilers, chrome, and most decorative trims deliver almost no business value.
First—an "just in case" roof rack. If you carry long items a few times a month, it will spend most of its time carrying itself: adding weight, noise, and vehicle height. Second—heavy fixed cabinets from day one. They look great, but they easily eat up space for bulky boxes, suitcases, or long items.
Third—completely ignoring the bulkhead. Many think it’s easier to remove, but in real work it means more noise, worse safety, and less pleasant daily use. Fourth—buying parts without considering the body: SWB or LWB, low or high roof, one or two side doors, new or previous generation.
And finally, purely decorative items. If the budget is limited, every hryvnia spent on trims and exterior tuning before solving the cargo side almost always works worse than a floor, straps, and proper mounting.
| What to install first | What can be postponed | What is not required | Why |
|---|---|---|---|
| Floor protection in the cargo area | Full sound deadening | Chrome and decorative trims | The floor takes a beating from day one, and cosmetics don’t affect the work |
| Mats and seat covers in the cab | Expensive finishing materials | Interior tuning for looks | Dirt and wear appear quickly in a work van, and comfort extras can be added later |
| Rails, rings, straps for securing | Fixed shelves and cabinets | Heavy systems without a clear scenario | First you need to understand how exactly you carry cargo, and only then give up volume to furniture |
| Bulkhead or a solution for long items | Roof rack | Complete bulkhead removal | For most business tasks, long items are better kept inside than immediately moved to the roof |
| Compartment lighting if you work in the dark | Additional exterior accessories | Spoilers and decorative body kits | Lighting saves time every day, while exterior parts rarely pay back in work |
More expensive solutions are justified when the van actually earns money with them. If long items ride weekly and don’t fit even with a load-through, then it makes sense to look at a roof rack for factory mounting points. For work Transit vehicles where the roof is constantly used for ladders, pipes, or profiles, it’s logical to separately check roof systems for Transit. And for versions with a different roof type or integrated rails, it’s worth looking at options for integrated rails.
The same applies to rigid cabinet modules and full protection kits for the compartment. If the vehicle works daily as a mobile workshop or a service van with a fixed equipment set, an expensive kit pays off with order and faster access. But if today you carry boxes, tomorrow long profiles, and the day after suitcases, a modular setup is almost always more practical than a permanent build-out.
From a customer’s experience: a Custom owner initially wanted to install a large roof rack and fixed shelves right away, because it seemed the van would be "ready for anything." After reviewing the real scenario, it turned out the main cargo was boxes, small tools, and occasional long items up to the internal length with load-through access. As a result, he started with the floor, securing, and cab protection, and postponed the roof—and didn’t lose usable volume or money on a system that would have been empty most of the time.
A starter Ford Custom upgrade for business and cargo should be grounded: first protect what wears out, then secure what moves, and only after that add what costs a lot and takes up space or weight. For most scenarios, the smartest order is: floor, mats, seat covers, cargo mounting, a solution for long items, and only then the roof, cabinets, and other heavy systems.
This approach is what separates useful upgrades from marketing clutter. This material is based on real selection experience, hands-on practice, and real usage scenarios where what matters is not the number of accessories, but how much they make daily work easier.
| ✔ | At first, floor protection, mats, and covers are offered — the things that actually reduce wear from daily work. This provides a practical effect without major expenses and without losing useful space. |
| ✔ | Particular emphasis is placed on securing cargo with rails, rings, and straps. This setup helps prevent boxes and tools from shifting in corners and allows the configuration to be quickly changed for different loads. |
| ✔ | For long loads, a partition or pass-through loading is recommended instead of automatically installing a roof. This preserves safety, creates less noise, and does not force you to lift materials up top all the time. |
| ✔ | The approach is built step by step: first the basic items, and expensive solutions only after a real test of the scenario. This reduces the risk of buying something unnecessary and losing useful space. |
| ✔ | The article clearly emphasizes compatibility with a specific generation, wheelbase, roof height, and body type. This is practical because it helps avoid buying an accessory at random that then won’t fit or will be inconvenient to use. |
| ✘ | The starter set hardly solves the issue of organizing small cargo if there is already a lot of work and the use case is stable. In that case, without shelves or modules, you will have to invest again later. |
| ✘ | Full-scale solutions such as a roof, cabinets, or heavy kits are deliberately postponed, so you won’t get a “ready for anything” van quickly. First, you need to drive for a few weeks and clarify your real needs. |
| ✘ | For some versions, especially passenger or kombi models, certain solutions may be less convenient than they seem at first. For example, a roof or fixed furniture easily eats up space and may sit empty most of the time. |
| ✘ | The plan requires careful weight calculations for the additional elements, because protection, a rack, and full packages can add up to dozens of kilograms. For a vehicle with a working payload, that is already a noticeable downside. |
Shipping to EU
Wholesale and retail
Own warehouse
Опис продукту
Подарунки не надаються при оформленні покупки у кредит під 0,01% або при покупці частинами.