06.05.2026
470
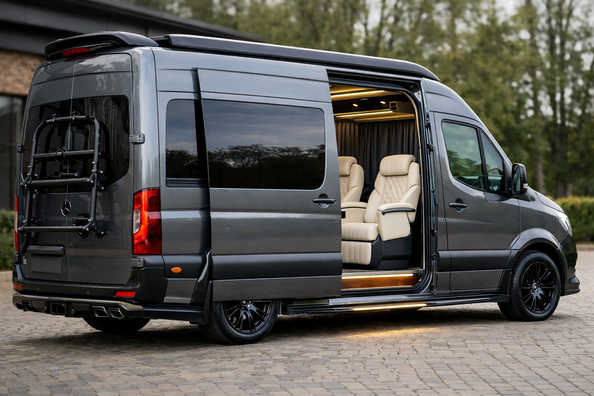
This upgrade plan is for those building a Mercedes Sprinter W907/W910 into a restrained VIP passenger format: transfers, intercity trips, corporate transport, work with demanding passengers. The key here isn’t shine—it’s quietness, entry/exit, cabin temperature, and a clean, tidy impression without visual noise.
Before buying parts, start from the exact base vehicle: 144 or 170, roof height, number of rows, presence of factory rear climate, and the seat mounting layout. With a 170 High Roof it’s easier to build 6–9 comfortable seats with a reserve of space, while the 144 makes more sense for city routes where maneuverability matters and an excessive lounge-style layout isn’t needed.
A proper Sprinter for VIP passengers shouldn’t “wow”—it should remove fatigue. A person should be able to sit down without an awkward step, not hear the boom from the wheel arches and roof, not freeze in winter on the third row, and not feel suffocated in summer under all that glass. That’s what separates an expensive but appropriate build from an interior that was simply trying to look “rich.”
The second task is not to compromise the vehicle’s basic safety. On a Sprinter you can’t randomly work in airbag zones, block drainage, mount seats on unsuitable floor sections, or relocate belts “however it fits.” If the body and generation aren’t verified precisely, a mistake in mountings or electrics can cost more than any décor.
The first priority is a quiet, dry foundation. Start with the floor, arches, roof, side panels, and sealing, using materials that don’t absorb moisture and don’t create corrosion traps. On a Sprinter, the biggest gains are felt exactly here—not in decorative panels.
The second step is proper passenger seats and their mountings. For a VIP scenario it’s not only about softness and armrests, but seating geometry, a proper aisle, and correct belt operation. If you install large seats, immediately check whether they eat into the walkway and luggage space—especially on the shorter 144 wheelbase.
The third must-have block is rear climate. If the vehicle has only one type of rear circuit, comfort can be one-sided: it either cools well or heats well. For a full passenger cabin, this isn’t cosmetic—it’s a baseline function.
| Upgrade | Why it’s needed | Who really benefits |
|---|---|---|
| Sound and thermal insulation of the floor, arches, roof | Reduces road noise, overheating, and fatigue on long trips | All VIP builds, especially highway use and high-roof vans |
| Captain’s chairs or a well-designed new seating layout | Provides proper seating posture, legroom, and a usable aisle | Business-class transfers, 4–9 passengers, intercity |
| Rear climate circuit | Equalizes temperature across rows, not only up front | Full cabins, hot climates, long routes |
| Separate electrics for lighting, charging, tables | Eliminates wiring chaos and overloading factory lines | Anyone adding lots of extra equipment |
| Curtains, calm indirect lighting, neat trim | Creates privacy and visually “pulls together” the cabin | Business trips, evening transfers, work with repeat clients |
DD Tuning expert comment: the most common Sprinter mistake is starting with the headliner, ambient lighting, and decorative inserts while the arches still drone and the rear row doesn’t have proper temperature. The second typical mistake is buying good-looking universal seats without checking mount compatibility, seating height, and aisle clearance. In selection, a calm, well-built foundation almost always beats a flashy showroom picture.
After the foundation, it makes sense to move on to electrics and everyday-use features. That includes charging ports, individual reading lights, power outlets, folding tables, and additional lighting scenarios. It’s best done through factory-correct integration, not by crude splices into the wiring.
In the second stage, curtains, a passenger screen for long trips, and a digital rear-view mirror are also often justified—if the rear view is blocked by seatbacks, luggage, or a partition. But these things only make sense once the cabin is already quiet and temperature control works properly.
This group includes things that won’t save the project, but finish it nicely: a soft non-gloss headliner, even warm lighting, privacy curtains, a neat floor, and thought-out entry lighting. For passengers in business attire, side steps can also be appropriate—if they truly make entry easier rather than just adding bulk.
As for exterior upgrades for this scenario, only what doesn’t shout about itself is needed. Chrome, bulky overlays, and aggressive body kits almost always make the W907/W910 look cheaper. If you want a premium effect, it comes from material texture, even panel gaps, and the absence of unnecessary décor.
People waste money on anything that doesn’t serve the passenger-transport scenario. The most typical: glossy inserts, excessive chrome, multicolor contour lighting throughout the cabin, and large decorative ceiling panels—while arch noise still makes it hard to hear a conversation.
Another pointless spend is expensive media solutions for short city transfers. If the route is 20–40 minutes, the passenger will appreciate quietness, stable temperature, and a comfortable seat more than a big screen. Likewise, it’s not worth overpaying for a complex lounge layout on the short wheelbase if it steals the aisle and makes the cabin feel cramped.
A separate high-risk segment is random seats, belts, and mountings without a clear understanding of compatibility with your body. For the W907/W910, this isn’t a small detail—it’s where the most painful mistakes happen.
| Install first | Can be postponed | Not required |
|---|---|---|
| Sound insulation of floor, arches, roof | Reupholstering the headliner | Chrome trim pieces |
| Seats, mountings, belts | Tables | Decorative “piano-lacquer” panels |
| Rear climate | Privacy curtains | Excessive multicolor lighting |
| Proper electrics for additional equipment | Digital rear-view mirror | Large screen for short transfers |
| A floor that’s easy to clean and presentable | Spot lighting for passengers | Exterior decorative body kit |
More expensive solutions are justified where you feel them every day with your body—not just with your eyes. That’s primarily seats, climate, and the quality of the acoustic foundation. If you need a comprehensive interior rethink, it’s logical to start with the interior upgrades section, not with random decorative items.
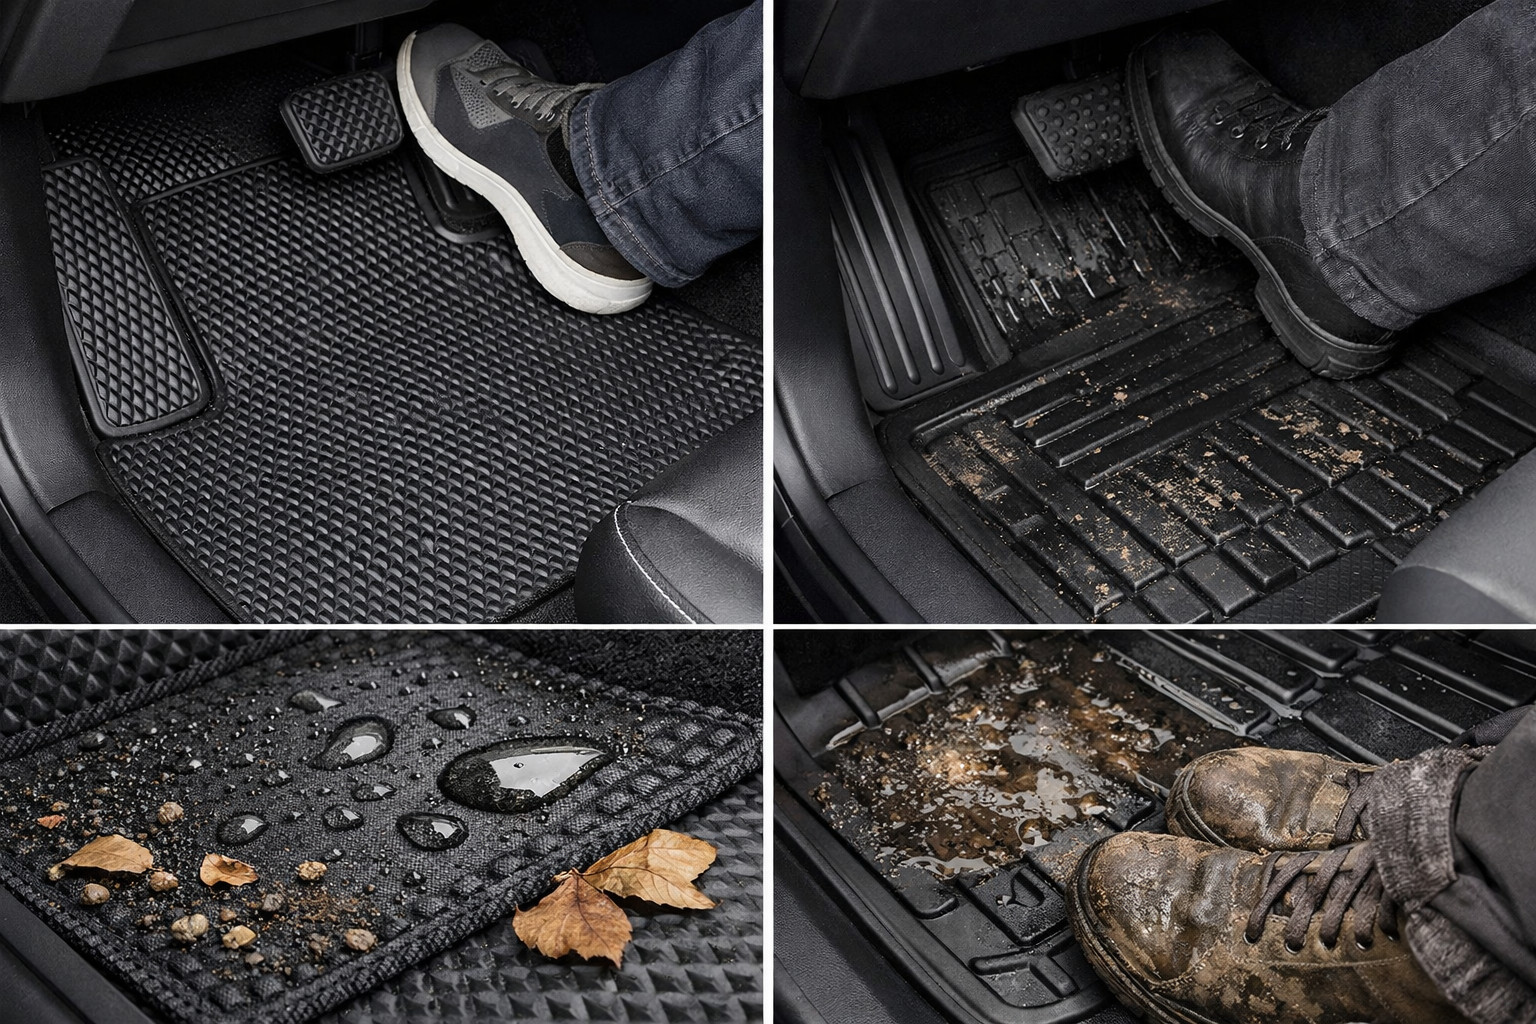
As for materials, it’s worth going pricier when you need a restrained tactile effect without gloss and when the vehicle works with repeat clients. In this scenario it makes sense to look at Alcantara seat covers or similar solutions in character—if they don’t conflict with your seating layout. For the lower cabin area, EVA mats can sometimes be justified too, but only if they support a neat look and don’t visually cheapen the interior.
The most expensive isn’t always the best. If the budget is limited, it’s better to invest in quietness, seats, and rear climate than to spread money across lighting, headliner, and décor.
From a client’s experience: in one typical request, the owner of a Sprinter 170 initially wanted a glossy headliner, chrome accents, and a big screen because “it has to look expensive.” After reviewing the trip scenario, the project was built differently: a quiet foundation, four large seats, proper rear climate, curtains, and calm lighting. As a result, the cabin started to look more expensive precisely because it’s pleasant to ride in—not because it shines.
For a Mercedes Sprinter W907/W910 in a VIP passenger scenario, the right order is almost always the same: first quietness and thermal insulation, then seats and mountings, then rear climate and electrics—and only after that lighting, curtains, and decorative finishing. That’s how you get a cabin you’re not ashamed to show and one the passenger genuinely wants to ride in again.
This material is based on real selection experience, hands-on practice, and real usage scenarios—not catalog gloss. If you cut out the excess and don’t buy things “for the picture,” a Sprinter can be built into a restrained, premium-feeling vehicle without a cheap effect.
| ✔ | Starting the upgrade with sound and thermal insulation for the floor, wheel arches, and roof is practical: this is what most reduces noise, heat buildup, and fatigue on the road. For VIP transport, this is more important than decorative elements. |
| ✔ | Properly selected passenger seats and their mounts provide real comfort: a correct seating position, legroom, and a convenient aisle. For the 144 short wheelbase, it is specifically emphasized that this helps avoid taking up the luggage area. |
| ✔ | The rear climate circuit evens out the temperature throughout the cabin, not just in the front. This is especially useful for full occupancy, hot climates, and long routes. |
| ✔ | A separate electrical system for charging, lighting, tables, and other equipment reduces wiring chaos and the risk of overloading the factory lines. It is a practical solution for vehicles with many additional functions. |
| ✔ | Curtains, indirect lighting, and restrained trim help preserve privacy and give the cabin a neat appearance. This approach is suitable for business trips and evening transfers without unnecessary visual noise. |
| ✘ | Glossy inserts, excessive chrome, and bulky trim in this scenario look out of place and can even make the cabin feel cheaper. The author directly advises avoiding aggressive visual styling. |
| ✘ | A large screen or complex media solutions are hardly justified for short city transfers of 20-40 minutes. In this mode, the passenger values silence, temperature, and the seat more than entertainment features. |
| ✘ | Lounge seating on a short wheelbase can take up the aisle and make the cabin cramped. For W907/W910, this is a risk if the layout is not checked against real dimensions and the number of passengers. |
| ✘ | Universal seats, belts, and mounts without checking body compatibility are a dangerous way to save money. The article emphasizes that mistakes in this area cost more than any decoration. |
Shipping to EU
Wholesale and retail
Own warehouse
Опис продукту
Подарунки не надаються при оформленні покупки у кредит під 0,01% або при покупці частинами.